
My friend Sarah Nego is here today to talk about a program that will allow you to help others tweet content for you!
Beth, thanks for having me. Blog tours, guest posts, blog hops, hosted cover reveals, and the list goes on and on. As an author you want to get your work in front of as many readers as possible. So you share your content with other bloggers in the hopes that their audience is interested. That can be a lot of work for one audience, but with a few tweaks you can help your message spread further than a single blog.
Obviously, the first step in getting shares is having great content. Let’s assume you’re going to pull out you’re A-game for guest posts. So what else can you do to increase views? Almost every site you visit these days has share buttons, encouraging viewers to share the blog content with social media sites. 
This is great, but they’ve become so common place that readers skip right over them without even realizing it. If you want readers to share your content, you have to make the request easy and visible. Tweet This!
See what I did there. If you click on that little link, it takes you right to a tweet already set with the content and link back here. It is both easy and highly visible, meeting all our needs for encouraging readers to share. Go ahead and test it out, you know you want to. I’ll wait.
Back? Great! Easy peasy, right? The good news is setting up those little social media gems is super easy, too. Here’s how.
Step one, you need to get a short little link for your post. Twitter is pretty limiting on your characters so you don’t want to waste all your space with an overly long link. There are lots of sites that will do this, but I’m a big fan of Bitly.
It’s super easy to use. When you get there, just pop your link into the box in the top right corner.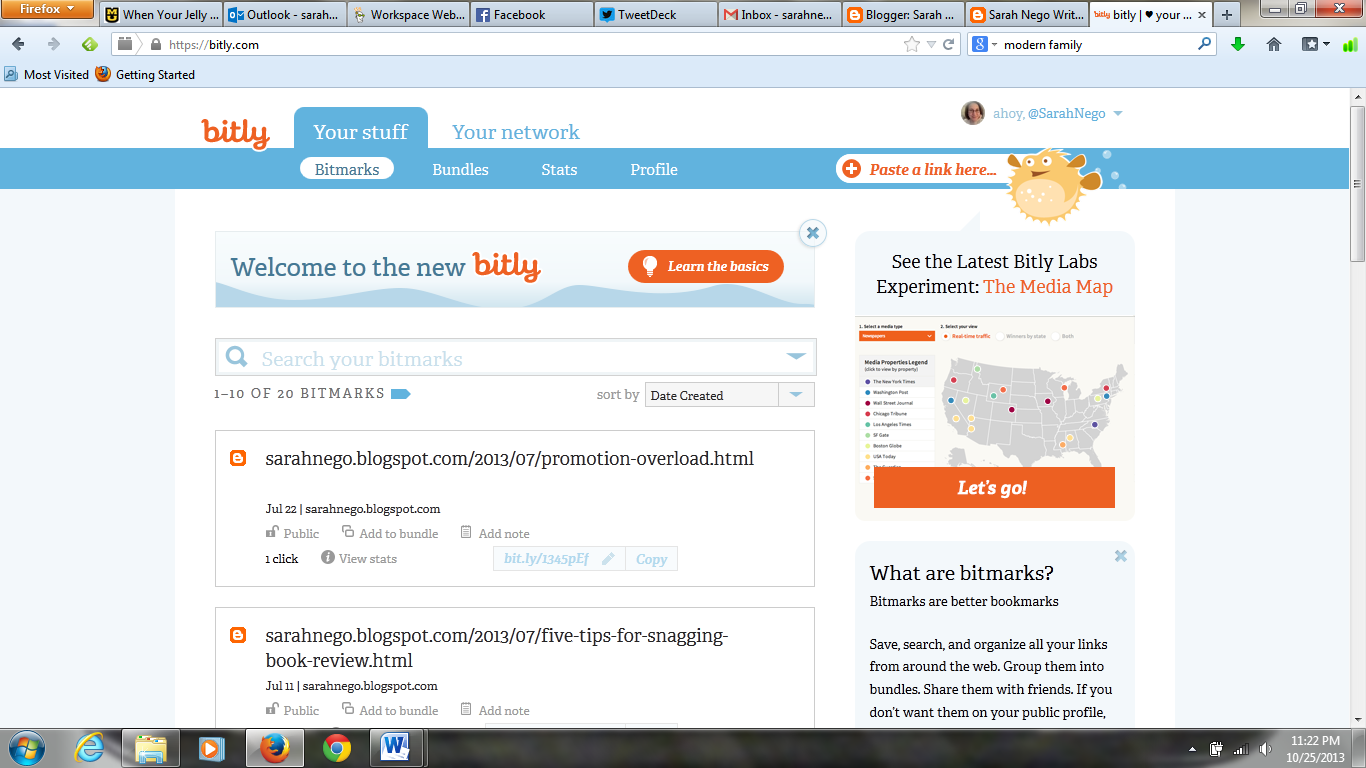
When you do, the site will give you a shortened link that you can use anywhere to direct folks to your post. It also catalogs your link and tracks how many times someone clicks on it. If you’re so inclined, it will also generate a QR code for you. All for free.
Once you have a shortened link, you’re next stop is Click to Tweet. This is where you customize what each tweet will look like.
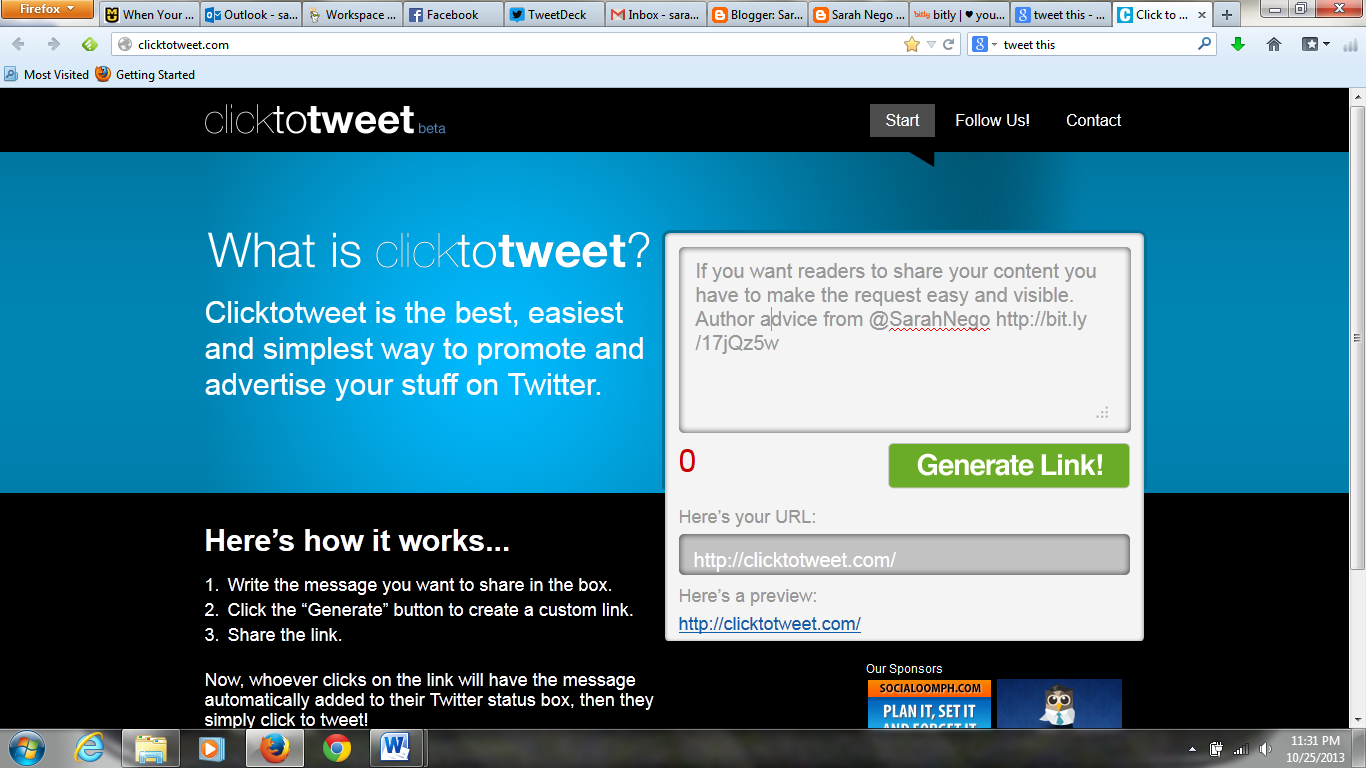
I recommend including your own Twitter handle so you are notified when someone uses the link, but since Bitly does this for you it’s not required. It does make it easy for you to thank readers for spreading the word.
Once you click the little Generate Link! Button, you get the fancy url to use as part of your post.
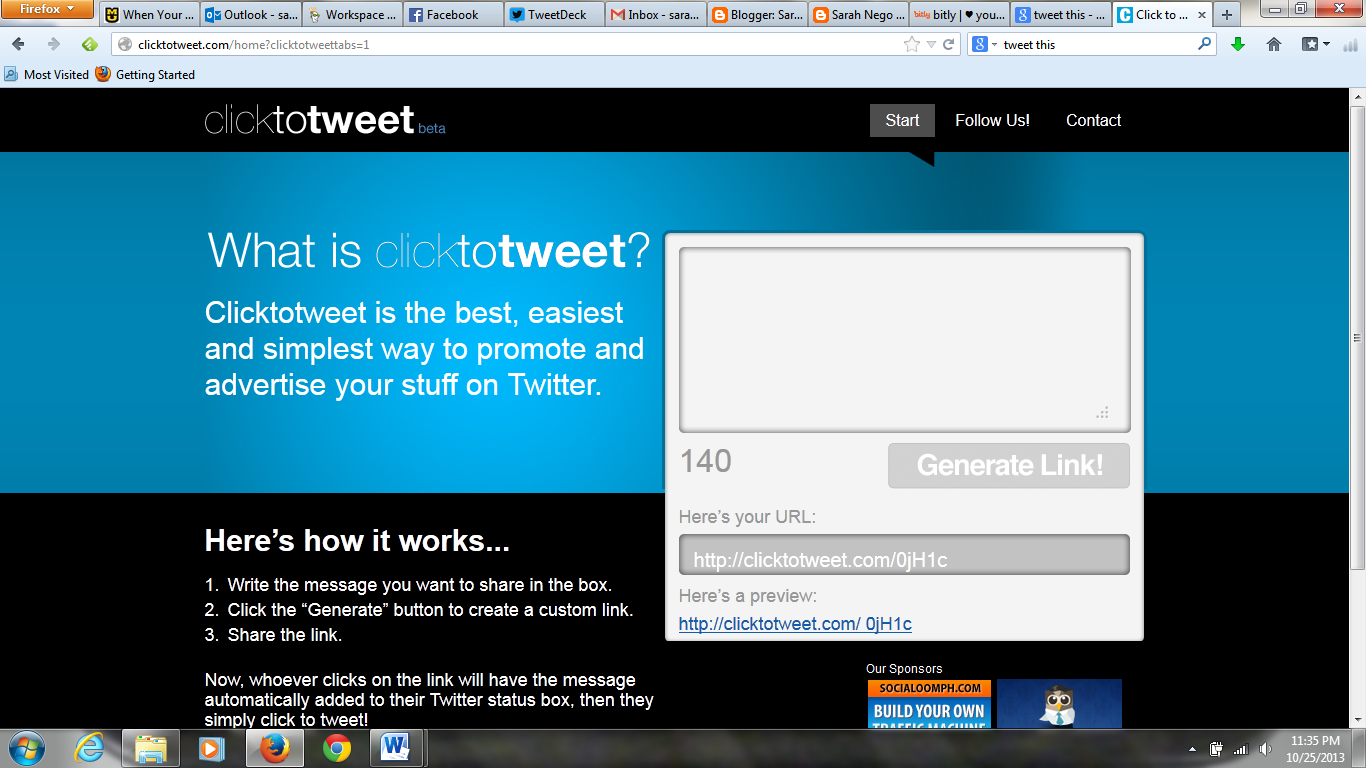
That’s it!
It may seem complicated, but I promise it’s not. I am not generally good with website tech, but I was able to figure this out, so you know it can’t be rocket science.
You can insert the links directly after a quote within your post, or include several of them at the bottom. I have no idea if one is more effective than the other, so just go with what looks better to you.
Next time you write a guest post or plan a blog tour, include this extra way to spread the word. Yes, it means a little extra work, but it’s worth it to reach new readers!
 And if you want more great advice from Sarah, check out her series on the DIY blog tour throughout November. A new post will go up every day in November, guiding writers step-by-step through the process of setting up your own successful blog tour. Post will include basic information as well as helpful tips to get the most out of your tour.
I want to steal Sarah's brain for a week. lol Great info, Sarah. Thank you! I've bookmarked the Click to Tweet.
ReplyDeleteI think she's teaching a class in the spring.
DeleteThis is good advice. I'm bookmarking this for the future. Thanks for sharing!
ReplyDeleteThanks for stopping by Shelley.
DeleteSarah, if you have to go to bitly for a short link then click to tweet to craft the tweet, how much time would you say this takes per post?
ReplyDeleteWhat great advice! I can't wait to try it out.
ReplyDelete